How to Choose Circular Knitting Machine Parts

Choosing the right circular knitting machine parts can determine whether production runs smoothly or stops beside a half-finished roll of fabric. Needles, sinkers, cylinders, cams, and feeders must work together with remarkable precision. A small mismatch can create dropped stitches, uneven loops, fabric lines, or unnecessary machine vibration. The part may look correct. It may still be wrong.

Experienced technicians usually begin with the machine brand, model, diameter, gauge, and production requirements. They check dimensions against the equipment manual, not only a supplier’s photograph. Needle length, latch design, sinker profile, and cam geometry deserve close attention. Material quality matters too. Hardened steel, accurate grinding, and consistent surface finishing can extend service life under continuous operation. Reliable suppliers should provide specifications, inspection records, and clear compatibility information. Traceable packaging also helps prevent mixed parts during maintenance.

Cost remains important, but the cheapest option can become expensive after repeated stoppages. I have seen teams replace one worn component while ignoring neighboring parts, only to repeat the repair weeks later. That approach is understandable, but incomplete. Wear patterns often reveal tension problems, poor lubrication, or incorrect installation. Careful inspection should accompany every replacement. Even trusted brands can produce unsuitable parts for a particular machine configuration. Compare samples, confirm tolerances, and test a small quantity before committing to a larger order. This guide explains how to evaluate circular knitting machine parts with practical judgment, technical evidence, and a willingness to question assumptions.
How to Choose Circular Knitting Machine Parts

Understanding the Main Types of Circular Knitting Machine Parts

Choosing circular knitting machine parts starts with understanding their roles. Needles form each loop, while sinkers control the fabric edge and loop release. Cams guide needle movement through carefully shaped tracks. Cylinders and dials hold these moving elements in precise alignment. Feeders and yarn guides control delivery, tension, and placement. Take-down rollers then pull the knitted tube at a stable rate.

Small differences matter. A worn needle may create vertical lines, dropped stitches, or uneven fabric weight. Damaged cams can increase vibration and accelerate needle wear. The Textile Exchange Materials Market Report 2024 reported global fiber production of 124 million tonnes in 2023. That scale increases pressure for efficient, repeatable knitting and fewer avoidable defects. Parts selection should match gauge, cylinder size, yarn type, speed, and fabric structure. Compatibility matters more than a low purchase price.

Tips: Inspect needle latches, sinker edges, and cam tracks under bright light. Measure critical dimensions before ordering replacements. Keep one removed part for comparison. Record machine speed, yarn count, fabric faults, and replacement dates. ISO 9001-based maintenance practices also support traceable inspection records. Do not ignore sound changes. A faint clicking noise can appear before visible damage. I have found that “universal” parts are rarely universal in practice. This is where judgment remains imperfect. Even a correct part can fail when lubrication, alignment, or yarn tension is neglected.

How to Choose Circular Knitting Machine Parts

Understanding the machine gauge is essential when selecting compatible needles, sinkers, cylinders, dials, and cams. The chart shows the nominal needle pitch for common circular knitting machine gauges.

Needle pitch is calculated as 25.4 mm divided by the machine gauge. A higher gauge indicates finer needle spacing and generally requires correspondingly finer, gauge-matched parts. Always verify exact dimensions, working height, slot geometry, and machine specifications before ordering replacement components.

Assessing Machine Compatibility and Technical Specifications

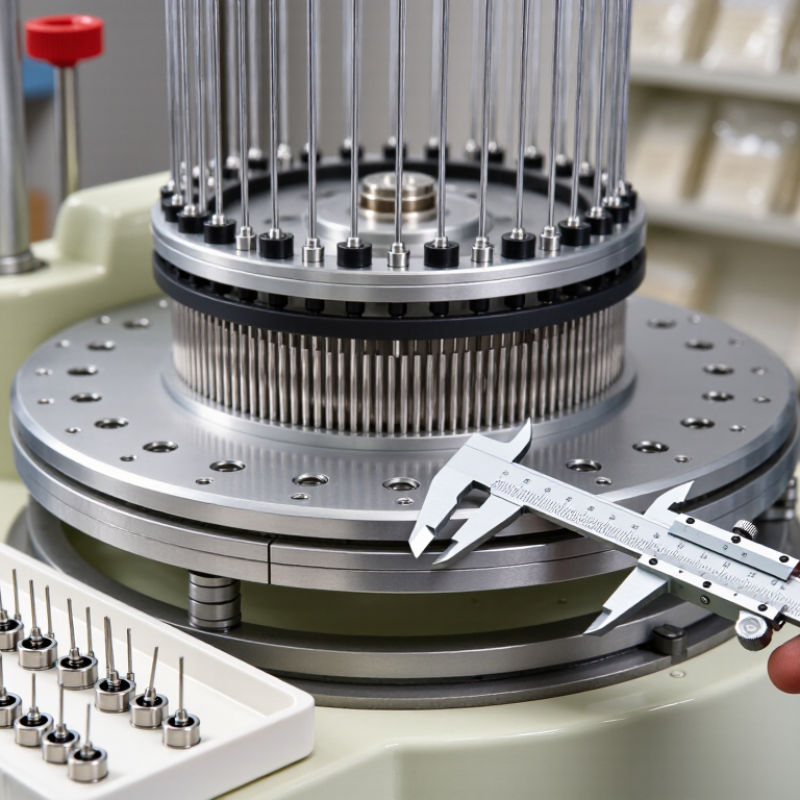
When selecting circular knitting machine parts, compatibility is more than matching a product photo. In my maintenance work, I compare cylinder diameter, needle count, machine gauge, and knitting system layout. A small mismatch can create dropped stitches, uneven fabric, or repeated needle breakage. Measure the existing part with calibrated tools. Do not rely on memory.

Check the technical drawing for dimensions, mounting holes, thread direction, and working clearances. The cam profile must suit the needle movement and intended fabric structure. Also verify material hardness, surface finish, heat resistance, and allowable wear limits. These details affect service life under continuous operation. Confirm the part’s tolerance range, not only its nominal size. A two-hundredth-millimeter difference may matter in a high-speed mechanism.

Review the machine manual, maintenance records, and supplier test documents before ordering. Ask for inspection reports when the component controls timing or yarn delivery. I once approved a replacement after checking its dimensions, but missed a slight difference in mounting depth. Installation took longer, and the machine required extra adjustment. That mistake changed my process. I now test fit critical parts manually and record alignment readings before full production. Keep spare parts clean, sealed, and clearly labeled. Good records make later troubleshooting faster. Still, no checklist catches everything. Physical testing remains essential.

Evaluating Part Materials, Durability, and Manufacturing Quality

How to Choose Circular Knitting Machine Parts
Evaluating Part Materials, Durability, and Manufacturing Quality

A circular knitting machine part should match the machine’s speed, load, and working environment. Material choice affects friction, heat control, and service life. Hardened steel often suits needles, cams, and other high-contact components. It resists wear when lubrication is consistent. However, hardness alone does not guarantee reliable performance. Excessive hardness can increase brittleness under impact.

For moving parts, inspect the surface finish carefully. A smooth needle groove reduces yarn damage and prevents irregular fabric marks. Corrosion-resistant alloys can help in humid production rooms. Polymer guides may reduce noise, but their heat resistance requires verification. I once overlooked a small burr on a guide edge. It created repeated snags after several production hours. That mistake changed my inspection routine.

Durability also depends on manufacturing quality. Check dimensional tolerances, edge consistency, heat-treatment records, and inspection reports. Parts should fit without force or unusual adjustment. Ask whether the supplier uses calibrated measuring tools and batch traceability. A clear quality record is more useful than a polished product description. Small variations matter. Even a slight cam profile difference can affect stitch formation and machine vibration. Before full production, test replacement parts at moderate speed. Monitor noise, temperature, fabric appearance, and yarn tension. Keep notes from the trial. This evidence supports better purchasing decisions, although short tests cannot reveal every long-term weakness.

Comparing Suppliers, Costs, Availability, and Support Services

How to Choose Circular Knitting Machine Parts

Choosing circular knitting machine parts starts with the machine’s actual working conditions. Check the model, needle size, gauge, and production material before contacting suppliers. A part that looks identical may have different tolerances. I once selected a lower-priced sinker that fitted physically but caused uneven loops after several hours. That mistake delayed production and increased waste. Measure carefully.

Supplier comparison should include more than the listed price. Request material specifications, dimensional drawings, inspection records, and a clear quotation. Ask whether standard parts are in stock or made after payment. A cheap component loses value when delivery takes three weeks. Confirm packaging, shipping time, minimum order quantities, and replacement procedures. Keep one tested spare set for critical positions.

Support quality often reveals supplier reliability. A capable technical team should explain installation, lubrication, adjustment, and likely failure causes. Fast replies matter during a stopped production shift. Written guidance is better than vague promises. Ask about warranty terms and response times before ordering. Stock availability can change unexpectedly. Verify it.

Cost comparisons also need life-cycle thinking. A durable part may reduce needle damage, fabric defects, and machine adjustments. However, expensive does not always mean better. Review batch consistency and test a small quantity when possible. My own selection process still needs improvement; I sometimes focus too heavily on delivery speed. Production records, technician feedback, and return history can correct that habit.

Inspecting, Testing, and Maintaining Replacement Parts

How to Choose Circular Knitting Machine Parts

Replacement parts should be inspected before they reach the machine. Check dimensions, surface finish, holes, threads, and edge damage under strong light. A new-looking needle cylinder can still have uneven slots. That small defect may create dropped stitches, fabric lines, or repeated needle breakage. Record the part number, material, supplier lot, and inspection date. Experience matters here. I once trusted a clean bearing without checking its seal. It failed early.

Testing should copy real operating conditions. Rotate shafts by hand before installation. Measure runout, clearance, electrical continuity, and lubrication flow when applicable. Compare readings with the machine manual and previous maintenance records. The U.S. Department of Energy’s Operations & Maintenance Best Practices Guide reports that predictive maintenance can reduce downtime by 35–45% and maintenance costs by 25–30%. These figures are not guarantees. Poor measurements can mislead technicians. Do not replace parts only because they look worn; confirm the failure pattern.

Tips: Keep one approved sample for visual comparison. Use a calibrated gauge, not guesswork. Photograph unusual wear before cleaning. After installation, run the machine slowly and inspect the first fabric rolls. Check stitch consistency, noise, temperature, and vibration. Recheck fasteners after the initial production period. Maintenance plans often look perfect on paper, but real machines behave differently. Record that difference.

How to Choose Circular Knitting Machine Parts - Inspecting, Testing, and Maintaining Replacement Parts
Part Primary Function Important Selection Dimensions Inspection Before Installation Practical Testing Method Replacement Trigger Recommended Maintenance Inspection Priority
Knitting Needles Forms loops by moving through the needle cylinder and receiving yarn from the feeder. Machine gauge, needle length, butt profile, latch design, and needle-bed compatibility. Check the hook, latch, slot, shank, and butt for burrs, bending, cracks, discoloration, or uneven wear. Slide the needle through its slot by hand. It should move smoothly without sticking or excessive side play. Replace a needle when the latch does not close freely, the hook is bent, the butt is worn, or fabric shows repeated vertical defects. Clean lint from needle slots and use only the lubricant specified for the machine. Avoid mixing new and visibly worn needles in one working area. High
Sinkers Controls the fabric edge and supports the loop during needle movement. Machine gauge, sinker shape, throat profile, sinker height, and compatibility with the sinker ring. Inspect the nose, throat, heel, and working edge for rounding, chips, grooves, or distortion. Place the sinker in its channel and confirm free movement without rocking, scraping, or abnormal clearance. Replace when the working edge is rounded, the sinker binds, or fabric edges become uneven or show recurring lines. Remove accumulated lint and oil residue from the sinker ring. Check the ring for scoring before fitting new sinkers. High
Cams Guides needle butts through the knitting path and determines stitch formation. Cam-track geometry, cam type, mounting dimensions, and compatibility with the cylinder or dial arrangement. Look for grooves, sharp edges, pitting, cracks, loose fasteners, and wear at the needle contact surfaces. Rotate the machine slowly by hand and verify that needle butts pass through the cam track without impact or resistance. Replace or recondition when the track profile is damaged, needle breakage increases, or the cam creates repeated stitch-length variation. Keep the cam box clean, verify secure mounting, and inspect lubrication points according to the machine service schedule. High
Cylinder and Dial Holds needles and establishes the circular knitting geometry. Diameter, gauge, slot count, slot width, dial height, and alignment with the mating component. Check slots for burrs, dents, corrosion, contamination, and signs of uneven wear. Verify that the mating surfaces are clean. Use a dial indicator to check runout where applicable and rotate the assembly slowly to detect tight spots or misalignment. Service or replace when slot damage cannot be removed, runout exceeds the machine maker’s specification, or alignment causes repeated needle failures. Clean slots with a suitable non-abrasive method and protect machined surfaces from corrosion during long storage. High
Yarn Feeders Delivers yarn consistently to the needles at the correct entry position. Feeder position, eyelet size, mounting style, yarn path, and compatibility with yarn count and machine gauge. Inspect the yarn eyelet and guide surfaces for grooves, sharp edges, looseness, or contamination. Thread the yarn and pull it manually through the complete path. The yarn should pass without snagging or abnormal resistance. Replace when the guide surface is grooved or sharp, yarn tension becomes unstable, or repeated yarn breaks occur at the feeder. Remove fiber buildup each shift or as needed. Confirm feeder alignment after any cam, needle, or cylinder adjustment. High
Yarn Guides and Tensioners Controls yarn direction and helps maintain stable yarn tension before knitting. Guide-eye material, eyelet diameter, mounting position, tension range, and spring or disc configuration. Check for polished grooves, burrs, cracks, damaged springs, contaminated tension discs, and loose mounting hardware. Measure yarn tension with a calibrated tension meter under normal machine speed and compare readings across feeders. Replace when tension cannot be adjusted consistently, the guide damages yarn, or the spring loses its restoring force. Clean tension discs and guide eyes without abrasive tools. Keep yarn paths free from oil, lint, and loose fibers. Routine
Bearings Supports rotating components and maintains smooth, accurately located movement. Bearing type, bore, outside diameter, width, clearance class, seal arrangement, and load rating. Check packaging, sealing surfaces, corrosion, dents, contamination, and visible damage. Never install a dropped bearing. Rotate by hand and listen for roughness. After installation, monitor temperature, vibration, and unusual noise during a controlled run. Replace when there is rough rotation, abnormal noise, excessive play, overheating, seal damage, or lubricant leakage. Use clean tools, avoid striking the rolling elements, apply the correct lubricant quantity, and keep replacement bearings sealed until use. High
Seals and O-Rings Retains lubricant and prevents dust, lint, and moisture from entering moving assemblies. Inside diameter, outside diameter, cross-section, material compatibility, temperature range, and groove fit. Check for cuts, flattening, hardening, swelling, surface cracks, and incorrect dimensions. Install without twisting and confirm uniform seating in the groove. Check for leakage during a low-speed trial run. Replace when a seal is damaged, permanently flattened, hardened, leaking, or removed during component disassembly. Clean grooves before installation and apply only a compatible lubricant. Protect seals from sharp tools and excessive heat. Routine
Take-Down Rollers Pulls knitted fabric from the knitting zone at a controlled and stable rate. Roller diameter, face width, surface texture, shaft dimensions, alignment, and pressure adjustment range. Inspect roller surfaces for glazing, cuts, flat spots, contamination, and uneven wear across the working width. Run the rollers slowly and check fabric tracking, roller parallelism, pressure uniformity, and slippage. Replace or resurface when fabric slips, tracks to one side, develops pressure marks, or the roller surface becomes uneven. Clean with an approved method, maintain parallel alignment, and avoid excessive nip pressure that can deform the roller surface. Routine
Lubrication Components Delivers lubricant to needles, cams, bearings, and other moving parts to reduce friction and wear. Reservoir capacity, pump output, filter size, tubing diameter, nozzle position, and lubricant compatibility. Check tubing for cracks or kinks, filters for blockage, nozzles for contamination, and reservoirs for sediment or water. Run the lubrication system and confirm visible, even delivery at each required point without pooling or dry areas. Replace blocked filters, damaged tubing, worn pumps, or nozzles that cannot maintain the specified delivery rate. Use the specified lubricant, clean or replace filters at scheduled intervals, and record oil changes and abnormal consumption. High
Fasteners and Locating Pins Secures replacement parts and preserves the alignment of machine assemblies. Thread size, pitch, length, head type, material, pin diameter, and required tightening torque. Inspect threads, heads, shoulders, pins, washers, and seating surfaces for wear, deformation, corrosion, or contamination. Confirm correct fit by hand before tightening. Use a calibrated torque wrench where a specified torque is available. Replace when threads are damaged, a fastener has stretched or corroded, or a locating pin no longer fits securely. Keep mating surfaces clean, use the correct washer or locking method, and do not substitute fasteners with unverified dimensions. Routine
Close
Go top
Translate »