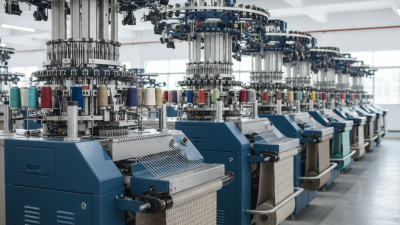
Choosing a circular rib knitting machine starts with the fabric, not the brochure. Rib structures demand reliable needle selection, stable yarn feeding, and consistent loop formation across the working width. A small variation can show up as uneven ribs, dropped stitches, or fabric that twists after finishing. The right specification depends on yarn type, gauge, diameter, target speed, and the exact fabric construction.
Industry data helps frame the decision. ITMF’s 46th International Textile Machinery Shipment Statistics report recorded 25,861 large circular knitting machine shipments in 2023, a 16% decline from 2022. That figure describes market shipments, not machine quality or future demand. Still, it reminds buyers to examine service access, spare-parts availability, and resale considerations alongside output. On the factory floor, a fast machine is not automatically the economical one. Downtime matters.
One point needs careful sourcing: I cannot verify a published, attributable quotation from a named circular-knitting expert specifically about choosing a rib machine, so I will not invent one. That restraint matters. Ask suppliers for trial fabric, production references, and documented settings for comparable yarns. Inspect the rib columns under steady lighting. Check whether the fabric stays balanced after washing. Small details count. A useful selection balances required output with fabric quality, operator skill, maintenance capacity, and the realities of your plant. The brochure may be convincing. The sample roll is better evidence.
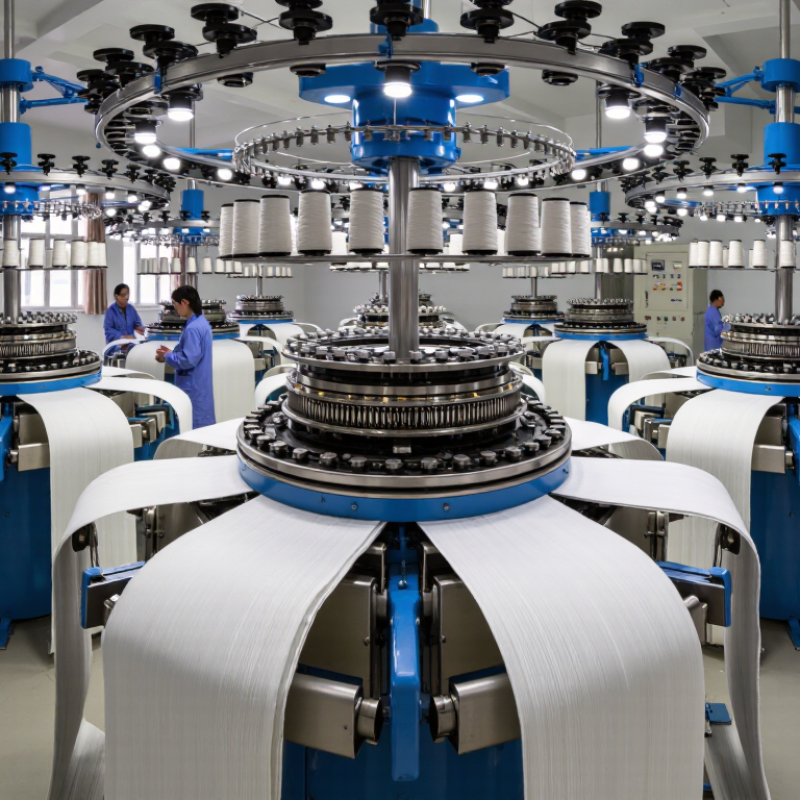
Begin with the fabric, not the machine speed. List the rib structure, such as 1x1 or 2x2, the finished width, target weight, and expected order volume. A circular rib machine uses cylinder and dial needles, so its gauge and needle arrangement must suit both the yarn and the fabric design. Very fine yarn on an unsuitable gauge can produce loose loops, uneven ribs, or frequent breaks. Make sample fabric before committing to a production setup.
Next, estimate daily output using realistic operating hours, not the maximum speed on a specification sheet. Consider the machine diameter, number of feeds, yarn changes, setup time, and expected stoppages. For example, a steady run of one cotton blend may need a different configuration from short orders with frequent color changes. Check whether the required yarn count feeds smoothly and whether operators can access the knitting zone for routine adjustments. Small details matter.
Record acceptable limits for fabric weight, width, shrinkage, and appearance, then test them after finishing. Compare actual output and defect rates across a representative run. A spreadsheet helps, but it cannot capture every production snag. This estimate is never perfect. Revisit it when yarn suppliers, order sizes, or finishing methods change; otherwise, a machine chosen for yesterday’s mix may sit underused.
Choosing a circular rib knitting machine starts with the fabric and finished dimensions you need. Machine diameter sets the approximate circumference of the knitted tube; a larger diameter can suit wider pieces, while a smaller one may fit narrow, tubular products. Allow for fabric stretch and finishing, since the relaxed dimensions can differ from the machine’s output. Measure a sample before settling on a diameter.
Tips: Knit a small swatch with your intended yarn. Check its width, recovery, and edge behavior after washing. It is a simple test, but easy to skip.
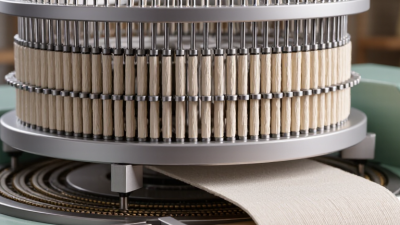
Gauge describes needle spacing and strongly influences fabric density and yarn suitability. A finer gauge generally supports lighter, finer fabrics; a coarser gauge often handles thicker yarns. Needle configuration matters too. Cylinder and dial needle arrangements determine how the needles work together to form rib structures, such as 1x1 or 2x2. Confirm that the setup can produce the stitch pattern you need, at your target speed and yarn range. A specification sheet may look clear, yet leave practical questions unanswered. Ask for a sample or trial, and check needle availability and adjustment requirements before choosing.
| Typical application | Nominal cylinder diameter | Typical gauge range | Approx. cylinder needle count* | Needle configuration | Selection notes |
|---|---|---|---|---|---|
| Narrow rib fabrics, cuffs, collars, and small tubular goods | 12–18 in (30–46 cm) | 14–20 needles per inch | About 530–1,130 | Cylinder and dial; set for 1×1 or 2×2 rib as required | Choose a smaller diameter when the finished tube width and intended product size are narrow. |
| General apparel rib fabrics and medium-width tubular goods | 20–24 in (51–61 cm) | 18–24 needles per inch | About 1,130–1,810 | Cylinder and dial; confirm the needle arrangement and cam setup for the target rib structure | A practical range for many apparel fabrics; confirm yarn count and target fabric weight with a sample knit. |
| Wider tubular fabrics and larger garment panels | 26–30 in (66–76 cm) | 20–28 needles per inch | About 1,630–2,640 | Cylinder and dial; select the setup for the required rib repeat and fabric width | A larger diameter produces a wider tube at the same stitch length and relaxation, subject to fabric take-down and finishing. |
| Fine-gauge rib fabrics and lightweight apparel | 28–34 in (71–86 cm) | 28–32 needles per inch | About 2,460–3,420 | Cylinder and dial; use fine-gauge-compatible needles, cams, and yarn | Higher gauge means more needles per inch and generally suits finer yarns; verify yarn suitability and stitch quality in trials. |
| How to estimate: Approximate cylinder needle count = π × diameter in inches × gauge (needles per inch). For example, a 30 in machine at 24 gauge has approximately 2,262 cylinder needles. This is an estimate; actual needle counts and available diameter/gauge combinations vary by machine design. Dial needle count is not included. | |||||
| Before choosing: Match the machine to the relaxed finished fabric width, yarn count and fiber, required rib pattern, and production needs. Confirm the manufacturer’s actual cylinder and dial needle counts, gauge, usable diameter, feeder arrangement, and sample-fabric results before purchase. | |||||
*Needle-count ranges are approximate estimates calculated from the stated diameter and gauge; they are not specifications for a particular machine.
Choosing a circular rib knitting machine starts with the fabric you need, not the highest advertised speed. A 1x1 rib has alternating knit and purl columns, giving it strong crosswise stretch and a clean, reversible surface. It suits cuffs, neckbands, and fitted basics. A 2x2 rib uses wider columns and often feels softer, but may recover differently after stretching. The yarn matters, too. A coarse yarn can make a fine-gauge structure stiff, while a slippery filament may need careful tension control.
Check how the machine’s cylinder and dial needles work together, then compare gauge, diameter, and feeder count with your product range. Finer gauges can create smoother, lighter ribs; coarser gauges accommodate bulkier yarns. More feeders may support higher output or varied yarn use, but only when the take-down system handles the fabric evenly. Ask for a trial using your actual yarn. Inspect the swatch for laddering, uneven ribs, and curling after washing. One test may not reveal everything.
Tips: Match the needle arrangement to the rib repeat you plan to run. Record settings during sampling. Small changes in yarn tension can alter stretch and recovery. There is no perfect setup for every fabric, and a promising sample can still behave differently in production.
A circular rib knitting machine should be judged by usable fabric output, not its advertised maximum speed. Estimate the kilograms or rolls needed per shift, then compare that target with output on your actual yarn and fabric structure. Cylinder diameter, feeder count, gauge, and machine speed all affect capacity. So does the time required to change yarn or reset a pattern. It varies.
Automation can protect production time, but only when its features fit the mill’s workflow. Yarn-break sensors can help operators respond quickly, while automatic lubrication and fabric take-down may reduce routine intervention. Check how clearly the control panel displays faults and whether operators can make adjustments without stopping the machine for long. More automation is not automatically better; unfamiliar controls can slow a team until training catches up.
Calculate operating costs beyond the purchase price. Include electricity, needles, oil, routine servicing, operator hours, and fabric lost during setup or quality checks. Ask for a trial using the intended yarn, and record output, stoppages, and defect rates over a realistic shift. A single test can still mislead. Yarn lots and operator experience change results, so leave room in the estimate for variability and maintenance downtime.
Compare estimated shift output with electricity use, then weigh automation features against your production needs.
How to read this: These are illustrative planning scenarios, not machine specifications. Output varies with machine diameter, gauge, yarn, fabric structure, speed, and efficiency. Electricity figures are calculated for an 8-hour shift using assumed motor loads of 2.2, 3.0, and 4.0 kW, respectively. Compare supplier-rated output and actual energy use for your fabric and operating conditions. Automation examples are indicative; features vary by machine.
Assess reliability through evidence, not a polished showroom run. Ask for maintenance records, component replacement intervals, and references from mills running similar gauges and yarns. During a factory trial, use your own yarn and target speed. Track stoppages, needle damage, fabric weight, rib consistency, and usable output across several shifts. One smooth shift proves little; I would not treat it as proof of long-term reliability.
Service support matters when a small fault can stop production. Confirm technician response times, spare-part availability, remote troubleshooting, and training for operators. The U.S. Department of Energy’s Operations & Maintenance Best Practices Guide reports that predictive maintenance can reduce maintenance costs by 25–30% and downtime by 35–45% compared with reactive approaches. These are broad industry estimates, not knitting-machine guarantees, but they show why preventive service deserves a place in your cost calculation.
Tips: Ask the supplier to document trial settings and defects per roll. Keep a sample from each run. Check it under consistent lighting, and involve the operators who will use the machine daily. Don’t skip this. A rushed trial can hide real production issues.