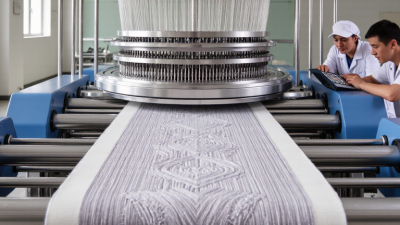
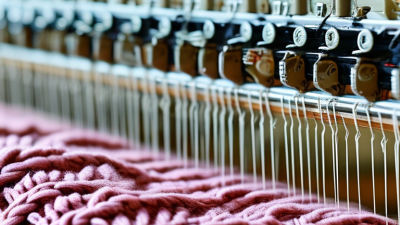
Choosing a knitting machine for home is not just a question of speed. It is about matching a tool to your space, skill level, and the projects you actually want to make. A compact flatbed machine may suit a spare-room table and occasional scarves; larger, more versatile models can handle broader plans, but need room and practice. Small details matter. Needle spacing, yarn compatibility, and setup time can shape the experience more than a long feature list.
Industry figures offer useful context, though they do not measure knitting machines alone. Grand View Research estimated the U.S. arts and crafts market at USD 20.8 billion in 2022, reflecting broad interest in hands-on creative activities. That figure covers many crafts, not machine knitting specifically. The Craft Yarn Council’s consumer research also provides insight into yarn users and their habits, helping explain why yarn choice deserves attention when comparing machines. Neither source can tell you which model will fit your home. Your own workspace can.
These seven tips focus on practical decisions: machine type, gauge, materials, learning curve, available space, maintenance, and budget. Check manufacturer specifications, and look for clear guidance on compatible yarn and replacement parts. A glossy product photo can hide a cramped work surface or a tricky setup. I would not assume that the most advanced machine is the best choice; beginners may value reliable basics more. Start with the projects you hope to finish, then compare machines against those needs.
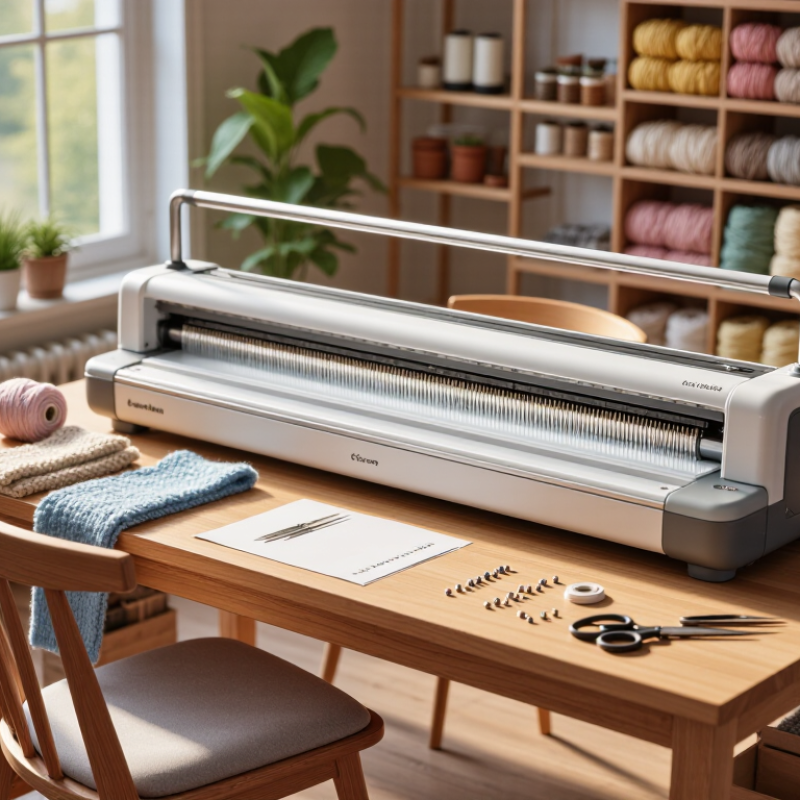
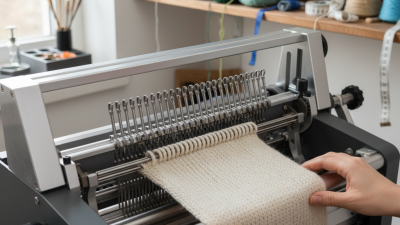
A home knitting machine forms fabric by turning yarn into connected loops on a row of needles. The needles hold the loops while a carriage travels across the bed, laying yarn into the next row. Each pass adds stitches. That repeated motion is the basic idea, though the machine does not knit itself: you guide the yarn, move the carriage, and watch for dropped or tangled loops. Small movements matter.
A tension mast helps feed yarn steadily, while a stitch-size dial changes how large or tight the loops become. On many flatbed machines, a comb and small weights keep the growing fabric hanging evenly. Patterning may involve selecting needles by hand or using a built-in mechanism, depending on the machine.
Before making a garment, knit a swatch with the same yarn and settings. Measure it after resting; the first reading can be misleading. A smooth swatch is useful, but it does not promise perfectly even fabric across a larger piece. That part is easy to underestimate.
If loops look tight or loose, adjust one setting at a time and test again. I would not skip that step, even when the fabric seems fine.
Choosing the best knitting machine for home starts with your projects, not the machine’s appearance. If you mainly make fine scarves, baby clothes, or fitted sweaters, a fine-gauge flatbed machine may suit you. It creates neat fabric with lightweight yarn. For blankets, chunky cardigans, and thick winter accessories, choose a larger-gauge machine with a wider needle spacing. Yarn weight matters greatly. A machine designed for thin yarn may struggle with bulky fibers, causing dropped stitches or uneven tension.
Your skill level also affects the right choice. Beginners often benefit from a manual machine with simple controls and clear instructions. It encourages careful tension practice and makes mistakes easier to understand. More experienced knitters might prefer pattern-selection features or electronic controls for colorwork and repeated designs. However, more features do not guarantee better results. I once chose a complicated machine too quickly. Learning it delayed my projects for several weeks.
Test the machine before purchasing whenever possible. Knit a small swatch using your usual yarn, then measure its rows and stitches. Check whether the carriage moves smoothly and whether the needles feel secure. Consider storage space, noise, cleaning needs, and replacement parts. A compact circular machine can produce tubes efficiently, but it may limit shaping options. A flatbed machine offers more control, yet requires more setup. Leave room for learning. The “perfect” machine may still feel difficult during the first few sessions.
| Tip | What to Consider | A Practical Match | Trade-Off or Check |
|---|---|---|---|
| 1. Start with the projects you want to make | List your usual projects, such as lightweight sweaters, scarves, hats, blankets, or textured accessories. Yarn weight and fabric drape affect the machine you need. | Choose a machine whose needle spacing and recommended yarn range suit the fabrics you plan to knit most often. | A machine that handles your favorite yarn well may not be ideal for very fine or very bulky yarns. Check the manufacturer’s yarn guidance before buying. |
| 2. Match the gauge to your yarn | Gauge describes the spacing between needles. Common home-machine categories include standard gauge at about 4.5 mm, mid-gauge at about 6.5 mm, and bulky gauge at about 9 mm; exact specifications vary. | Standard gauge is commonly used for finer yarns; mid-gauge suits many medium-weight yarns; bulky machines are designed for thicker yarns. | These are typical categories, not guarantees of yarn compatibility. Always check the specific machine’s recommended yarn range and make a test swatch. |
| 3. Choose a machine type that fits your experience | Manual machines use hand controls to select needles and form stitches. Pattern-selection systems can automate some repeating operations. | A basic manual flatbed can be a straightforward way to learn machine knitting. A pattern-selection machine may suit knitters who expect to make repeated color or stitch patterns. | Manual operation requires attention and practice. Automated pattern features can add setup steps and may require learning the machine’s patterning method. |
| 4. Decide whether you need patterning features | Consider whether you want plain fabric, textured stitches, or repeating color patterns. Some machines use punchcards; electronic models use digital pattern controls. | Choose basic controls for mostly plain knitting. Consider built-in pattern selection if you regularly plan to make patterned fabrics. | Pattern capabilities and design limits differ by machine. Confirm how patterns are entered, what accessories are needed, and whether the workflow suits you. |
| 5. Check whether a ribber is important | A compatible ribber adds a second needle bed, allowing stitches to be worked on two beds for ribbing and other double-bed fabrics. | A ribber can be useful for sweater cuffs, hems, neckbands, and fabrics that need more stretch or a different structure. | A ribber is often an additional purchase and requires setup and practice. Check compatibility with the exact machine model before choosing one. |
| 6. Consider available space and setup time | Flatbed machines need a stable surface and room for the carriage to travel. A ribber or other accessories can increase setup space. | Measure your work surface and storage area, and allow room to sit comfortably and move the carriage across the full needle bed. | A machine that fits in storage may still need a larger clear area when in use. Check the assembled dimensions and mounting requirements. |
| 7. Look beyond the initial purchase | Factor in yarn, weights, tools, optional accessories, maintenance, learning materials, and the availability of replacement parts. | For a first machine, prioritize clear instructions, accessible support materials, and the features needed for your planned projects. | More features do not automatically mean a better fit. Compare the complete setup cost and confirm that essential accessories are included or obtainable. |
A home knitting machine should match your yarn, project size, and patience. Gauge is the first filter. A fine-gauge machine suits socks, babywear, and smooth lightweight yarns. A mid-gauge model handles more everyday clothing. A bulky gauge creates faster, heavier fabric. Check the manufacturer’s needle spacing and recommended yarn range, not only the label. Textile Exchange’s 2024 Materials Market Report recorded global fiber production at 124 million tonnes in 2023. More fiber choices also mean more testing at home.
Knitting capacity affects comfort and waste. A standard bed may produce narrow panels, while a wider bed supports blankets and adult garments. Measure your table first. A machine that fits poorly becomes frustrating quickly. Consider carriage weight, row counters, transfer tools, and spare needles. In my own swatching, I have underestimated yarn thickness more than once. The result was stiff fabric.
Patterning features deserve careful comparison. Manual transfer methods offer control and lower cost. Electronic or punch-based systems reduce repeated counting and support colorwork, tuck stitches, and textured designs. However, more features can increase setup time. A 2023 report from the Craft Yarn Council shows continued participation in handcrafting across age groups, but participation does not guarantee technical confidence. Choose a system you can repair and understand. Begin with a small swatch. Then test a full repeat.
Tip 1: Measure your workspace before shopping. Include the machine, yarn cone, chair, and room for hand movement. A narrow table can make setup frustrating. Tip 2: Check storage access. You need a dry place for needles, weights, manuals, and spare parts. Tip 3: Review power and lighting needs. Bright, adjustable light helps you inspect stitches without leaning forward.
Tip 4: Match the machine with your yarn plans. The Craft Yarn Council’s Standard Yarn Weight System divides yarn into seven weight categories. However, categories are only a starting point. Check the manufacturer’s gauge range and recommended fiber types. Tip 5: Test a small swatch first. Wool, cotton, acrylic, and blended yarns can behave differently. A yarn that looks smooth may still snag or stretch unevenly. Textile Exchange’s Materials Market Report 2024 estimated global fiber production at 124 million tonnes in 2023. Choosing compatible yarn reduces avoidable sampling waste.
Tip 6: Inspect the setup process before buying. Threading, carriage movement, and tension adjustment should feel understandable, not mysterious. Tip 7: Plan maintenance realistically. Remove lint after each session, wipe exposed surfaces, and inspect needles for bends. Follow the service schedule in the manual. I would not assume “low maintenance” means no maintenance. Skipping cleaning can quietly affect tension and stitch quality. Keep a small log of yarn type, gauge, and adjustments. It may reveal patterns that memory misses.
Use this comparison to prioritize the main factors when choosing a home knitting machine. Higher scores indicate greater importance for everyday home use, especially where space, setup, yarn compatibility, and maintenance are concerned.
7 Tips for Choosing the Best Knitting Machine for Home
Balance price, support, and long-term value before chasing extra features.
1. Define your projects first. A beginner making scarves needs different functions than someone producing fitted garments.
2. Check gauge compatibility. The wrong gauge can make yarn selection frustrating and expensive.
3. Compare total cost, not only the checkout price. Include needles, weights, transfer tools, maintenance, and replacement parts.
4. Read the warranty carefully. Look for coverage length, repair procedures, and realistic response times.
5. Test the learning support. Clear manuals, troubleshooting videos, and active user communities can prevent a silent machine gathering dust. Support matters.
6. Inspect the build quality. Move the carriage slowly, examine the needle beds, and listen for uneven resistance. A small defect may become a daily irritation. I once underestimated storage space; the machine fit the table, but not the yarn boxes.
7. Calculate cost per year. Divide the complete purchase cost by your expected years of use, then compare service availability.
WRAP’s Valuing Our Clothes report found that extending clothing life by nine months can reduce carbon, water, and waste footprints by about 20–30%. That supports choosing equipment that encourages durable making, not quick replacement.
The Ellen MacArthur Foundation also reports that doubling clothing use can cut emissions by 44%. These figures concern garments, not machines, but they offer a useful value framework.
Cheap can be expensive. Reconsider the model if basic support depends on scarce parts or unclear instructions.